7 Things You Should Know About The preimage Defined In Math
There’s a lot to love about the preimage defined in math. For starters, it’s a great way to learn about how different shapes and numbers can be related. It’s also a great tool for helping to visualize problems and solutions. Here are seven things you should know about the preimage defined in math:
1. The preimage is a way of representing numbers and shapes in relation to each other.
2. It’s a great way to learn about number relations and geometry.
3. The preimage can help you visualize problems and solutions.
4. It’s a helpful tool for teaching kids about math concepts.
5. The preimage is used in many different areas of math, including algebra and calculus.
6. There are online resources available that can help you learn more about the preimage defined in math.
7. With a little practice, you’ll be able to use the preimage defined in math to solve all sorts of problems!
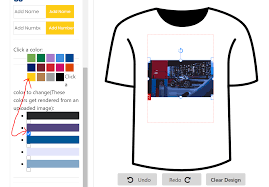
green screen background images
When it comes to green screen backgrounds, there are a few things you should know. First and foremost, what is a green screen background? A green screen background is simply an image that has been created with a green screen. This means that the image can be used as a background for another image or video.
There are many benefits to using a green screen background. One of the most notable benefits is that it allows you to change the background of an image without having to worry about the quality of the image being affected. Additionally, green screens are often used in movies and TV shows to create special effects.
If you’re looking for some great green screen background images, there are a few places you can look. One option is to search for royalty free images online. There are also many websites that offer stock photos that can be used as green screen backgrounds.
multi image dockerfile
A “multi image dockerfile” is a dockerfile that defines multiple images, each with its own set of instructions. This allows you to create different versions of your application, each with its own dependencies and configuration.
For example, you could have a development version of your app that uses one set of dependencies, and a production version that uses another. Or you could have a staging version that uses a different database than your production version.

Multi image dockerfiles can be very helpful in managing different versions of your application, but they can also be confusing if you’re not familiar with them. Here are some things to keep in mind when working with multi image dockerfiles:
1. Make sure each image has its own unique name and tag.
2. Keep the number of images in your dockerfile to a minimum – only define as many as you need.
3. Be explicit about which instructions go with which image. If an instruction doesn’t apply to all images, make sure to specify which ones it does apply to.
4. Be aware of the order in which your images are built – this can affect the order in which instructions are run.
5. When using multi-stage builds, pay attention to the order in which your stages are defined. This can also affect the order in which instructions are run.
6. Make sure to test your dockerfile thoroughly before deploying it to production!
super impose image
When you superimpose two images, you create a new image by combining the pixels from the two images. The new image will have the same dimensions as the original images, but the pixels will be combined to create a new image.
There are a few different ways to combine the pixels from two images. One way is to simply add the pixel values together. This can create some interesting effects, but it can also make the resulting image look very dark.
Another way to combine pixels is to take the average of the two pixel values. This will result in an image that is lighter than either of the original images.
You can also multiply the pixel values together. This will create an image that is darker than either of the original images.
Finally, you can use a technique called masking to selectively combine pixels from one image with another. Masking allows you to specify which pixels from one image should be used to create the new image. This can be used to create some very striking effects.