12 checkered background images
There’s something about a checkered background image that just looks exciting. Maybe it’s the fact that it’s always in motion, or maybe it’s the bold colors. Either way, we can’t get enough of them.
We’ve rounded up 12 of our favorite checkered background images to get you inspired. From bright and colorful to subtle and sophisticated, there’s sure to be one that catches your eye. So go ahead and take a look!
CSS image before and after
When creating a website, one of the most important aspects is the overall design. This includes the colors, fonts, and images used throughout the site. The background image is especially important, as it sets the tone for the rest of the page.
There are many different ways to create a background image, but one of the most popular methods is to use a CSS image before after effect. This technique allows you to overlay two images on top of each other, with a transparency effect in between. This can create a very striking and unique look for your website.
If you’re interested in using a CSS image before after effect on your own site, there are a few things you need to know. First, you need to have two images that you want to use. These can be any size or shape, but they should be similar in terms of the overall composition. Next, you need to add some code to your CSS file. This will tell the browser how to overlay the two images.
Finally, you need to add the code to your HTML file. This will ensure that the background image appears on your website when someone visits it. Just copy and paste the code into your HTML file and you’re all set!
sepia images
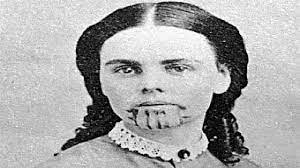
Sepia images are a great way to add an antique feel to your photos. To create a sepia image, simply convert your photo to black and white, then add a touch of brown or yellow.
There are many ways to create sepia images, but one of the easiest is to use an online converter like PicMonkey. Simply upload your photo, then click on the “Effects” tab and choose “Sepia.” You can adjust the intensity of the effect by moving the slider to the left or right.
If you want more control over your sepia images, you can also use Photoshop. To create a sepia image in Photoshop, first, convert your photo to black and white using the “Image > Adjustments > Black & White” menu. Then, go to “Filter > Render > Lighting Effects” and choose “Spotlight.” In the Spotlight window, set the light type to “Omni” and the color to “Yellow Orange.” Adjust the light intensity and angle until you’re happy with the results, then click “OK.”
how to convert an image into grayscale in python
There are a number of ways to convert an image into grayscale in python. One way is to use the PIL (Python Imaging Library). The PIL library contains a number of functions that can be used to manipulate images. One of these functions is the “convert” function, which can be used to convert an image from one mode to another.
To convert an image into a grayscale using the PIL library, you first need to open the image using the “open” function. Once the image is open, you can then use the “convert” function to convert the image into a grayscale. The syntax for this function is as follows:
Image.open(“filename”).convert(“L”)
where “filename” is the name of the image file you want to convert and “L” is the mode for grayscale images.
Once you have run this code, you should save the new grayscale image using the “save” function. The syntax for this function is as follows:
new_image.save(“filename”)
where “new_image” is the name of the new grayscale image and “filename” is the name of the file you want to save it as.

How to convert an image into grayscale in python
There are many ways to convert an image into grayscale in python. One way is to use the PIL (Python Imaging Library). This library has a function called “convert” which can convert an image from one color mode to another. To convert an image to grayscale, you would need to use this function and specify that you want to convert it to “L” or “LA” mode.
Another way to do this is by using the cv2 (OpenCV) library. This library also has a function for converting images from one color space to another. In this case, you would use the “cvtColor” function, passing in the image you want to convert as well as the code for the conversion you want to perform. For example, if you wanted to convert your image into a grayscale, you would pass in the code CV_BGR2GRAY.
Steps to follow in order to convert an image into grayscale in python
1. First, we have to import the Image class from the PIL (Python Image Library) module which consists of several classes including an Image class that is required for opening, rescaling, and showing images in python. To read an image in grayscale mode, we have to pass ‘L’ as the second argument to open the () function along with the image path.
2. After importing the Image class from the PIL module, now we can use resize() method on our object of Image class to resize our input image. We need two arguments passed to this resize() function. The first one is the new width and the second one is the new height according to which the input image will be resized. Both values are passed in tuple format inside this function.
3. Once we have resized our input image using resize() method then the show() method can be used on the object of the Image class which will finally display our input image into the output grayscale version
What are the benefits of converting an image into grayscale in python?
There are many benefits of converting an image into grayscale in python. One benefit is that it can reduce the file size of the image. This can be helpful when you want to save storage space or when you want to send an image over the internet. Another benefit is that it can help improve the contrast of an image. This can be helpful when you want to make an image easier to see or when you want to make sure that all the details in an image are visible.