5 Quick Tips for Aligning Images In WordPress
Are you using WordPress to manage your website images? If so, then you’re likely aware of the fact that it’s not always easy to get them perfectly aligned. In this article, we’ll show you five quick tips for getting the alignment just right.
1. Use the Align Images feature in WordPress
This is probably the easiest way to get your images aligned correctly. Simply go to Settings → Media and select Align Images from the menu. This will align all of your images automatically, assuming they’re stored in a single folder on your server. If not, you can manually align them by clicking on each image and dragging it into position.
2. Use keyword tags for alignment
If you want to do more than just align images – you want to give specific keywords priority when displaying your content – then use keyword tags as your guide. Simply place a [keyword] tag before each image filename, and WordPress will use those keywords as a guide when sorting and displaying your images. This is great if you have a lot of different images that need to be displayed based on their topic or subject matter.
3. Use Visual Composer for image alignment
If you’re comfortable with coding, then you can use Visual Composer to achieve even better alignment results than what’s possible with WordPress alone. With VC, you can specify exact widths and heights for each column of text within an image cell, which will ensure that the text always remains centered within its
python base image
WordPress is a popular content management system (CMS) used to create websites. It allows users to create a website from scratch, or to improve an existing website. One of the most important aspects of a WordPress site is the images that are included.
When aligning images in WordPress, it is important to keep several things in mind. First, make sure that the images are of the same dimensions. Second, make sure that the alignment settings for each image are correct. Finally, make sure that the image files are located in the correct location on your server.
To begin aligning images in WordPress, you first need to determine their dimensions. To do this, you can use a ruler or another measuring device to measure the width and height of each image. Once you have determined these dimensions, you can use WordPress’s alignment settings to properly align the images.
To align an image in WordPress, you first need to determine its alignment setting. The three main alignment settings are left, center, and right. You can also use the center alignment setting if all of your images have the same width and height. Once you have determined an image’s alignment setting, you can use WordPress’s alignment tools to properly position the image on your site.
Once you have aligned all of your images, it is important to make sure that they are located in the correct location on your server. You can store all of your image files in one location on your server, or you
In order to align images in WordPress, you first need to create a python base image.
This is done by selecting the image you want to align and then clicking on the “Add media” button.
Once you have clicked on the “Add media” button, you will be given a few options for how to align your image.
The first option is to select the alignment from the drop-down menu. The second option is to click on the “None” link which will allow you to manually align your image using HTML.
The third and final option is to click on the “Inline” link which will automatically insert your image into the text editor at its current position.
You can then use this image to automatically align all of your images in WordPress

If you have a WordPress site, then you know how difficult it is to keep all of your images aligned correctly. If you’re constantly uploading new images, then chances are that at least some of them will be misaligned.
Luckily, there’s an easy fix for this problem. You can use a plugin like ImageAlign to automatically align all of your images in WordPress. Simply install the plugin and activate it, and then all of your images will be automatically aligned correctly.
This plugin is especially useful if you have a lot of images on your site, or if you frequently upload new images. With ImageAlign, you can rest assured knowing that all of your images will always be aligned correctly.
This will help ensure that your images are always aligned and look their best.
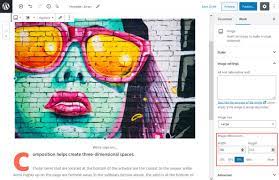
When creating a design in Canva, you can Lock Elements to keep them perfectly positioned, even as you make other changes to your design. This is especially helpful when working with images.
To lock an element in place, simply click on it and then select the “Lock” icon from the toolbar that appears above it. Once locked, the element will be fixed in place and you can continue making changes to your design without having to worry about it moving around.
hack android with image payload
There are a few quick tips for aligning images in WordPress that can save you some time and hassle.
1. Use the “Align” command from the Image toolbar. This will center the image on the page and add space around it to ensure that it looks good on all devices.
2. Use the “Align Left” and “Align Right” buttons in the Image toolbar to align images horizontally or vertically, respectively.
3. You can also use the alignment buttons in the Media Library to position images on your site. Just drag and drop them into the desired location, and they’ll automatically align themselves.
4. If you want to center an image inside a text box, you can use the “Center In Text Box” option in the Image toolbar.
5. To resize an image, just click and drag its corners until it fits the size you want it to be, or select it and use the sizing controls in the toolbar.